
On Wednesday 15 June, we welcomed our final guest speaker of the season when Alex Hare Zoomed in from Whitstable in Kent.
More of Alex’s work can be found at https://www.alexharephotography.com/
He is also on Facebook, Twitter, and Instagram.
Alex is a professional landscape and commercial photographer He also teaches photography, including in partnership with fellow landscape professional Lizzie Shepherd (who has also visited LBPC) on “Tripod Travels” tours.
In his “Long Exposures” talk, Alex explained what long exposure images are, why you might produce them, what subjects work well (and not so well), what kit is needed, how to calculate the length of exposure needed, what other camera settings to use, and much more besides.
The talk was pitched at “everybody” – from those who have never tried long exposures right up to those who are already well practiced.
What is a Long Exposure?
As used by Alex, “long exposure” is a relative term. It depends on the context, the subject, the prevailing conditions, and so forth. In effect, therefore, it is when the shutter is open for longer than “normal”. And Alex expressed this as being open for longer than you can shoot hand-held without camera shake. That covers everything from ¼ second to an hour and beyond.
The creative outcome being sought is to emphasise the passage of time in a still image. So really it means any shutter speed that captures movement. And you choose the shutter speed relative to whatever is moving in the image. You are aiming for “blur that looks good”.
The key setting, therefore, is shutter speed – supported by aperture and ISO, and facilitated by filters if necessary. And it is usually slower than 1/60 second.
You need to ask – “what’s moving, how do I want it to look, what is the shutter speed to achieve that?”
Why use Long Exposures?
Long exposures are a way of interpreting movement and invoking other sensory responses such as smell, touch, and noise. Also, there is a tension worth exploring between things which are moving juxtaposed with things which are fixed – for example, waves by cliffs, vehicles or people in streets, or waving plants in otherwise still landscapes. And long exposures illustrate time and time passing.
What subjects work?
Some subject work well. Others do not work at all. And, in any event, but particularly for subjects which don’t work well, you really need to have a compelling reason to use long exposure.
Water (such as waves, waterfalls, rivers, lakes) usually works well if there is energy, motion, and movement. Clouds generally work well, but you need to think about speed, direct, the potential effect of long exposure – do they need/warrant long exposure?
People also work well, as do “unpredictables” – things like light trails, kayaks, windblown objects, and other “variable speed” subjects (for example, boats bobbing on the sea).
Still things obviously don’t work. And these include fog, rainbows, mist and low cloud, still dawns and sunsets, and dead calm reflections.
What kit to use
Sometimes no special kit at all is needed.
Mostly, though, you need the following (depending on conditions).
- Big and Little “stoppers” (neutral density filters designed to reduce the amount of light entering the lens by 10 and 6 stops respectively).
- ND Grads (neutral density filters with a graduated transition between dark and light of 1, 2, or 3 stops).
- Polarising filter.
- Filter holder.
- Remote release (either cable or wireless), and
- Tripod (most important).
Technique and camera set up
Alex’s method is as follows.
- Set up the camera on the tripod, compose the image, and focus.
- Set aperture (for required depth of field), ISO, and shutter speed without any filters.
- Switch the lens to focus lock and add the filter(s).
- Adjust the shutter speed (see below).
- Take a test shot, review it, and adjust as required. (Don’t adjust the aperture as it will change the depth of field. If necessary, adjust ISO instead.)
Calculating exposure times with filters
There is a variety of ways to calculate the length of exposure required so that the shutter speed can be set once any filters are in place.
- Use Live View (on a mirrorless camera) if you have it.
- Use a long exposure calculator app on a smartphone. (There are several free ones available for both iPhone and Android.)
- Use a printed ND Filter Shutter Speed Conversion Chart. (Available online and sometimes provided with filters.)
- Calculate it in your head.
“Trial and error” works as well. But it wastes a lot of time and you risk missing the decisive moment.
Planning a long exposure shoot
As usual with photography, you need to plan where to go and what to consider.
- Pick a location.
- Check the weather forecast.
- Clean your filters.
- Keep cleaning clothes etc handy.
- Take a sturdy tripod.
In concluding, Alex recommended plenty of practice, always asking whether a long exposure “is a good idea”, previsualising, being careful with clouds (if they are not moving sufficiently they can look terribly “blobby”), and playing with mono conversions and infrared.
He emphasised that the key point of all this was “does long exposure result in a good creative outcome”!
Alex encouraged us to get out and about during the summer to have a go at as many different types of long exposures as possible. He wanted us to create portfolios of images created with shutter speeds ranging from fractions of a second up to several minutes. And, in preparation for our Long Exposure set subject competition next season, he will be back in September to review our efforts.
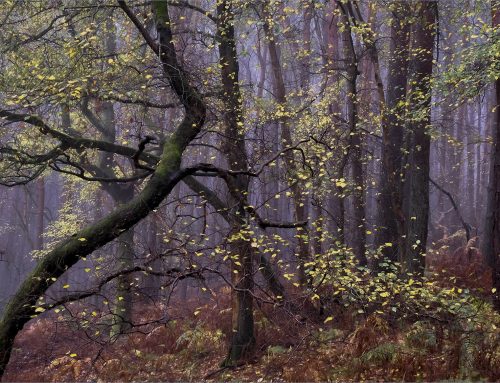
This fascinating talk was illustrated with plenty of Alex’s own beautiful images. They showed us how he interprets movement and the passage of time in all sorts of scenes, as well as invoking our other sensory responses. This was a most enjoyable and inspiring evening.


Leave a Reply